Much thanks to @hbgreg and @rob_neu for helping me wrap my mind around the best way to structure the code for this. You guys rock!
Edit: The CSS for this has been modified below to include a fallback for Firefox, since it wasn’t behaving well with the flexbox CSS I used.
Last week someone asked how to replicate a feature from a certain site via the Genesis Facebook group, so I thought it would make a good tutorial. Basically, the site in question shows a featured product and affiliate link next to the post excerpt on the main blog page.
This is a great feature for review sites, fashion blogs, or any site that frequently showcases affiliate products. I could also see this being easy to modify for other purposes, such as DIY projects or PDF downloads. I used this for a project recently and the designer (and her client!) were very pleased with the way it turned out.
Want to see what I mean to get a better idea of how this works? Check out the demo site!
First, let’s talk a bit about what this does.
- Normal posts display as usual
- A post with an image and URL entered (via Advanced Custom Fields) will display like the first post on the demo site
- Both the image and the link below it will link to the URL entered
- The two columns use Genesis column classes, so it’s mobile responsive out of the box
- Each element has a class applied to make it easy to style
- The featured image has been relocated above the post title on the demo, but this is optional
What You’ll Need
Before we begin, let’s gather up all the tools we’ll need to make this happen:
- The Advanced Custom Fields plugin (I used the Pro version, but the free version will work just fine)
- FTP access to the site you’re working on
- At least some level of comfort with editing
functions.php
Now for the fun part!
Display Products in the Genesis Loop
Step 1: Make a backup.
You knew I’d say that, right? But seriously, make a backup just in case. As always, I recommend BlogVault for this task.
Step 2: Install and activate the Advanced Custom Fields plugin.
ACF is a versatile plugin that can be used for almost anything. In this case, we’ll use it to add a URL field and image uploader for the product display.
Step 3: Create a field group.
Go to Custom Fields → Add New in your dashboard. Enter a name for the field group that makes sense (I used Featured Products). For the location section, I used “Post Type is equal to Post” since we are customizing the default Genesis loop.
Step 4: Add your custom fields.
THIS PART IS SUPER IMPORTANT. The names of your fields must match mine for the template to work correctly.
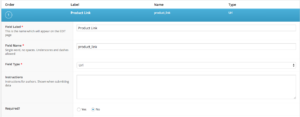
First, create a URL field if you’re using ACF Pro, or a text field if you’re using the free version. The field label should be Product Link, and the field name should populate with product_link automatically. (Click any of these images to view larger.)
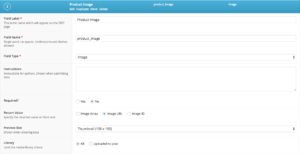
Next, create an image field. The field label should be Product Image, which gives you a field name of product_image. Be sure to choose Image URL for the Return Value.
Step 5: Add the template to your child theme’s folder.
Copy and paste the following into a file called product-view.php in your child theme’s folder (or you can download this file, unzip it, and upload the template instead):
Step Six: Add the necessary functions to functions.php
There are three functions involved:
- The first moves the featured image above the title (if your theme already moves the featured image, this may not work)
- The second adds a custom “read more” link to the content limit
- The third tells your theme to use this template for all archives, including category pages and author archives
Step Seven: Add some CSS.
This is the absolute most basic CSS ever (I used the Sample theme, after all) but you are welcome to expand on this as you’d like.
For the posts that display products, you can use the following classes to customize:
.home-products– The overall container for the content, read more link, product image, and product link.product-excerpt– The partial post content that displays.morelink– The “read more” link.product-view– the right column.product-image– the image uploaded via your custom field.product-link– the link added via your custom field that displays below the image
Step Eight: Change your theme settings.
In Genesis → Theme Settings → Content Archives, be sure you’re showing content instead of excerpts, then choose a content limit (I used 300 on the demo site).
Step Nine: Go write a post!
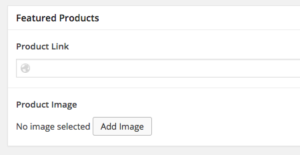
Now that the hard part is over with, go to Posts → Add New and look for the custom fields below the editor:
Add the URL you want people to go to when they click on the image or its link. Upload your image and you’re all set!
Let’s Review
In this tutorial, we have modified the default Genesis loop to display products and a link (think affiliates). We used Advanced Custom Fields to add fields for a product image and product link to single posts. We added a custom template to display the fields, some functions to help them display properly, and a little CSS to make things look nice.
This tutorial could be adapted easily to a number of different projects. You could modify the code to use for a custom post type, for example, or create an easy way for people to access content on another site.
Now that you know what to do, I’d love to see how this can be used on a live site! If you use this tutorial, please post a link in the comments so we can check out your work!


Used this today and it’s been amazing! One thing though, you can’t do it with the free version of ACF because it doesn’t give the option to link to a URL.
Thanks so much for this!
The free version should pull the URL from a text field – if that’s not the case, let me know and I’ll take another look at the template. It should grab it either way.
This is an ancient article,
so comments are now closed.